
It’s suggested by the National Bee unit that a comprehensive fact sheet be given to purchasers of a nucleus colony. This page can be copied and used as a template for your own fact sheet or you can send a link to this page. Remember to ‘personalise’ the points at the end of the text to suit the circumstances.
Upon receipt of your nucleus, you should transfer it to a full-sized hive as soon as possible unless there’s a good reason for not doing so which has been agreed by the supplier and purchaser in advance. If the nucleus is not transferred to a hive immediately it should be placed with the entrance open on the site of the eventual full sized hive.
Transferring to a full-sized hive
* Place your full-sized hive on the site you have chosen with the entrance facing in your chosen direction. Place your nucleus next to the hive with its closed entrance facing in the same direction as the hive.
* Remove the frames of foundation and/or drawn comb from the hive.
* Carefully place the frames from your nucleus into the middle of the hive in exactly the same order as they were in the nuc. Take extra care not to roll or crush the bees when removing the frames from the nuc or when placing them in the hive.
* Once all the frames from the nuc have been placed in the middle of the hive, add a frame of foundation or drawn comb to either side of the frames from the nuc. You can then either;
– fill the rest of the brood box with frames of foundation or drawn comb if you have some.
– OR (recommend) place a dummy board on either side of the frames you’ve already put in the centre of the hive. Keep a close eye on the bees and when they need more space, progressively add frames until the brood box has a full compliment of frames.
• Feed your bees an intermediate strength syrup (1kg sugar dissolved in 1 litre of water), by placing a top feeder or contact feeder over the feeding hole on top of the crown board. For further information on feeders and feeding, go to the Meridian website. Keep the feeder topped-up until your bees have drawn out the comb on all the frames and during periods of poor weather.
Now that you have your bees, you should inspect them regularly. Inspect them after one week to ensure they have sufficient stores. Then check every two weeks.
Regular inspections

Remove the brood frames from the outside edge of the hive nearest to you. Shake any bees back into the brood box and inspect both sides of the frame. When you have finished, set the frame against the side of the hive or place it on a frame hanger if you have one. Repeat the exercise for the second frame so as to make plenty of space in the brood box for you to work.
When inspecting frames, always do so over the hive in case the queen is dislodged. In that way, she’ll fall back into the brood box and won’t be lost in the grass. As you remove and replace the frames, take care not to roll or crush your bees.
What to look for?
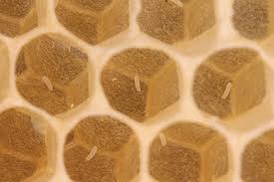
Record the total number of frames your bees are occupying and the number of frames containing brood. You can count again at the next inspection to assess your bees’ progress. Look for the queen. If you don’t see her, don’t worry too much, look for brood at all stages including eggs. If eggs are present (see photo) you can be fairly sure the queen is present and laying.
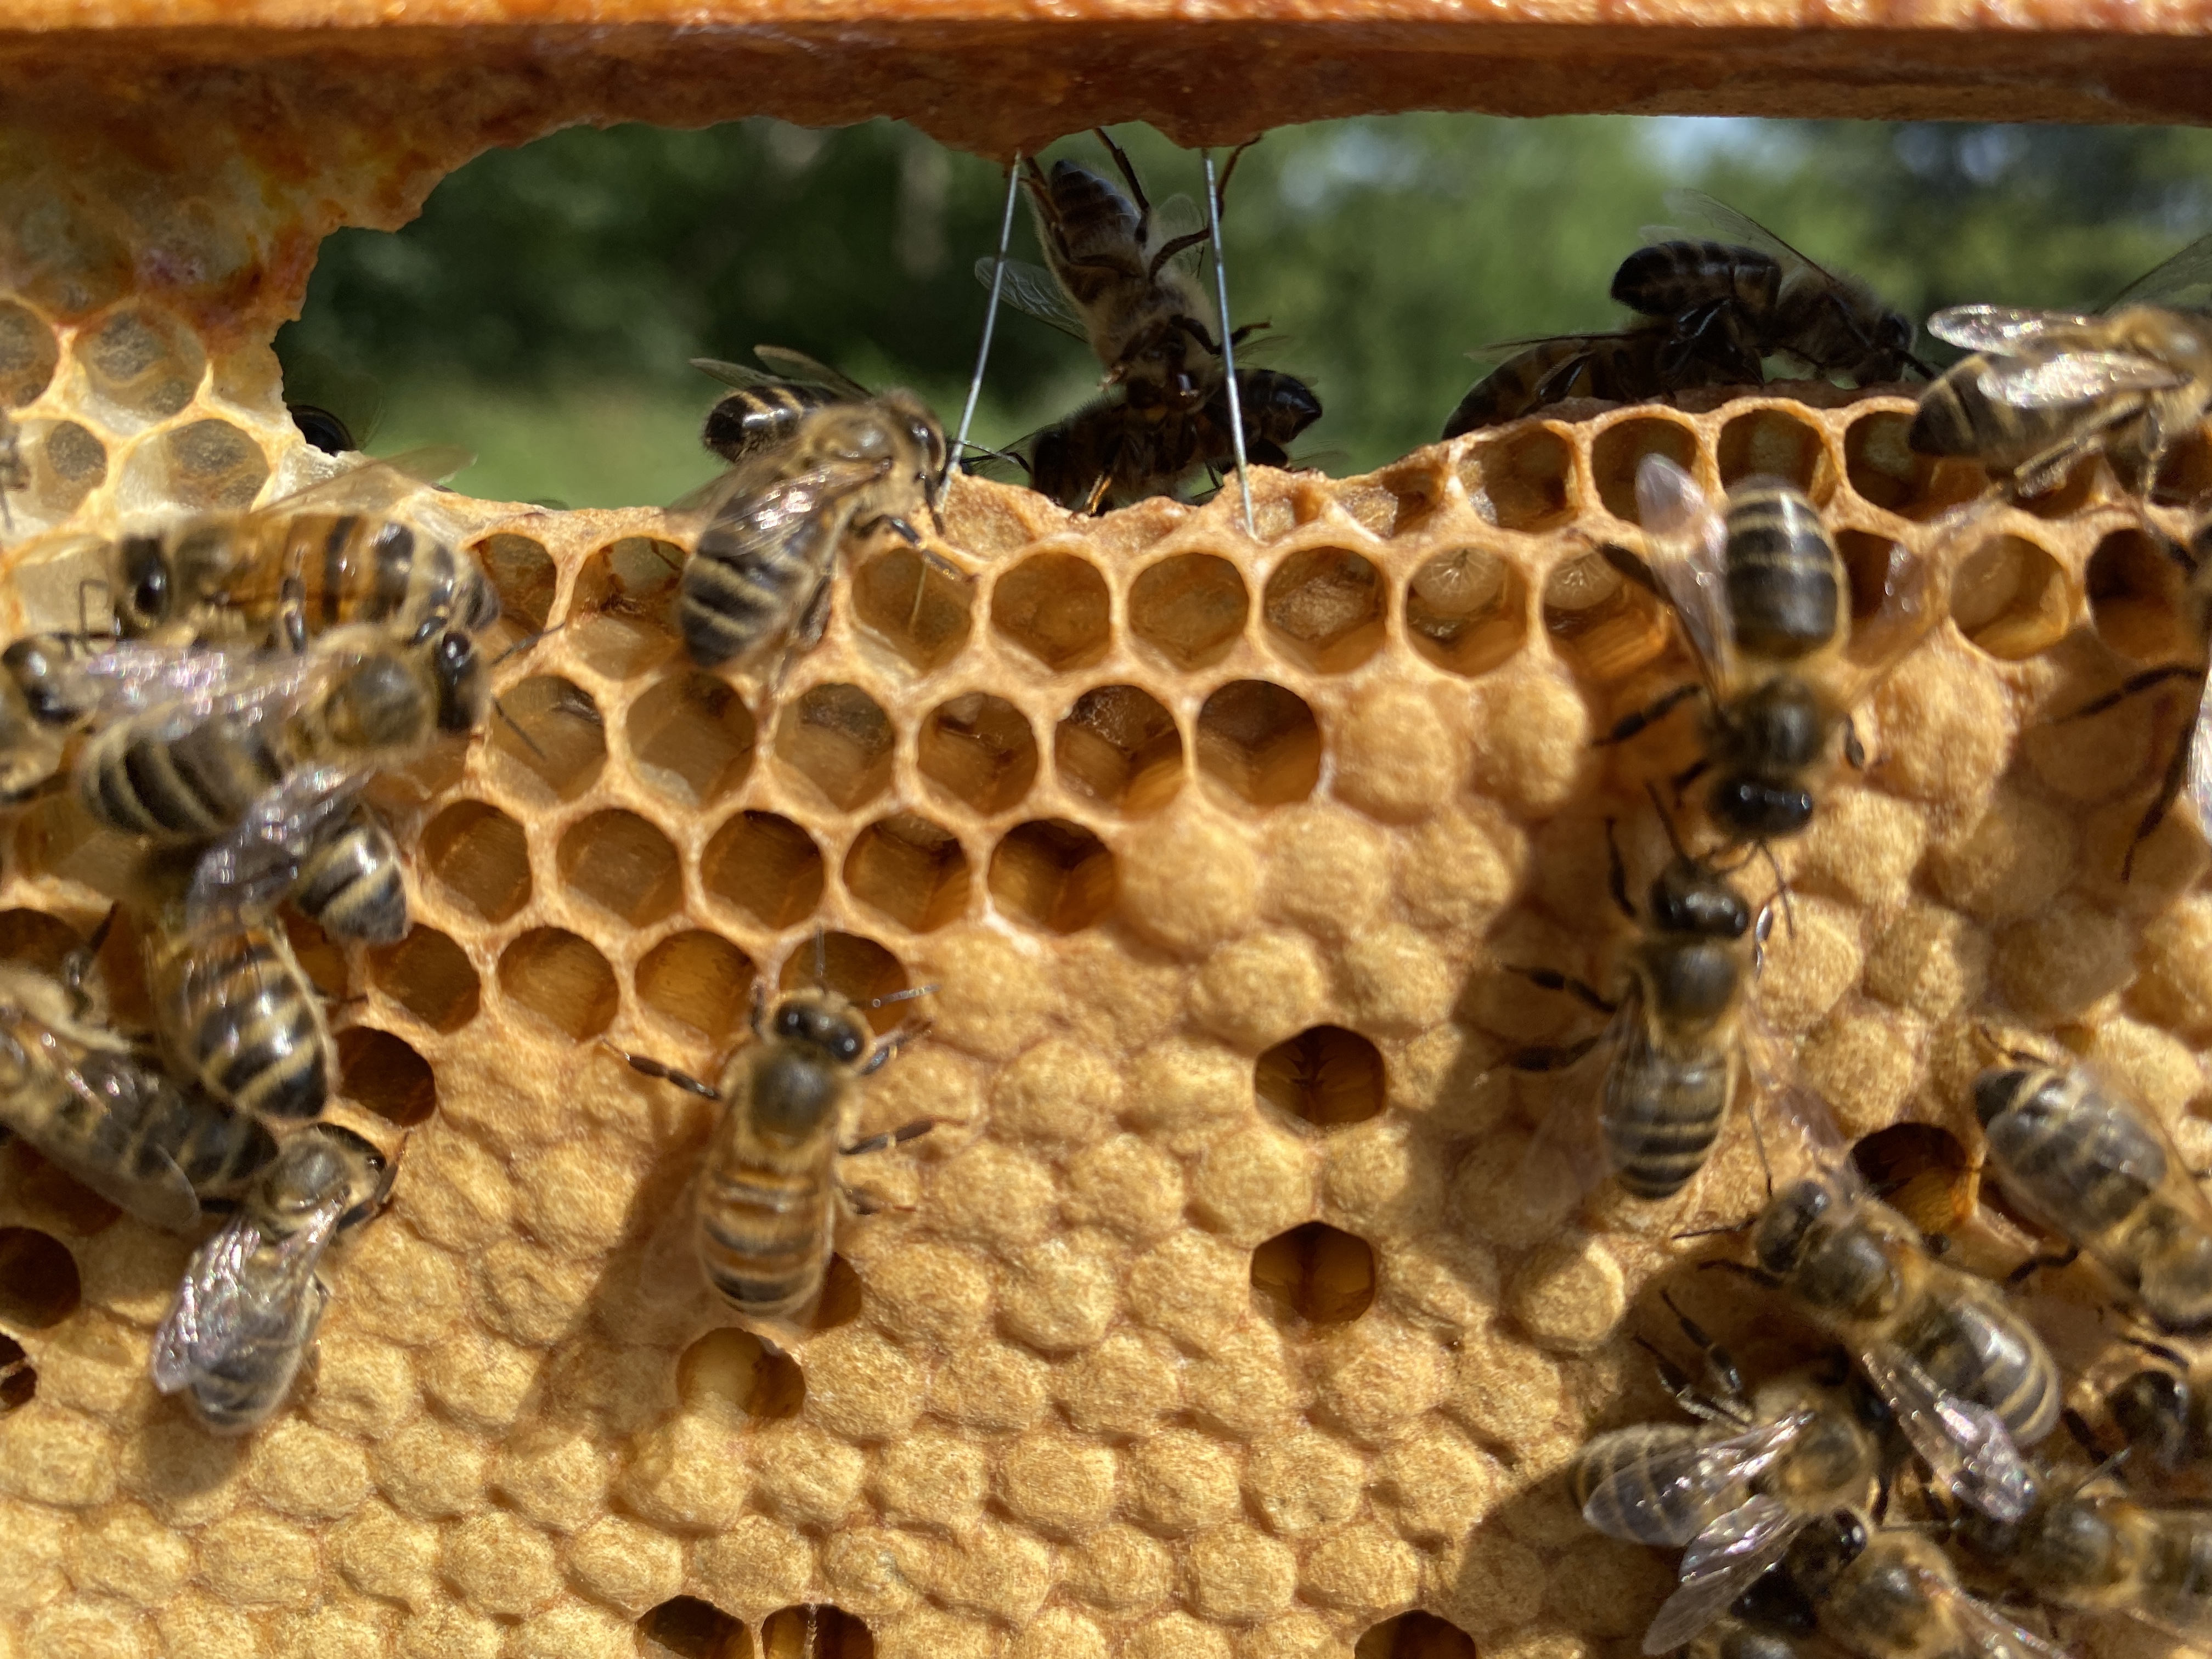
Check the brood is healthy
If you do see the queen, well done, you have sharp eyes! Place the frame she is on back in the hive, being careful not to drop her. Don’t shake off the bees from this frame.
You can now go through the other frames to check the brood is healthy. Shake off the bees from each frame in turn and examine them carefully.

Healthy brood is pearly-white. The segments of the bodies should be clearly visible and each larvae lies at the bottom of the cell in a ‘C’ shape. Cells containing eggs should contain only a single egg, standing on its end if it has just been laid or lying flat at the bottom of the cell if it’s two or three days old.
Cappings on capped brood should have a dry appearance and be the colour of a digestive biscuit. Sometimes, the cappings can be a bit darker especially on older comb.
Any deviations from these standards could indicate unhealthy brood, particularly if the larvae looks distorted or discoloured or the cappings have a moist, greasy appearance. If you see such signs, take photos if you can and ask your mentor or Meridian for help and advice.
Check there is sufficient food
As you go through the frames, make a mental note of the stores you see. A standard national brood frame holds 2.27kg (5lbs) of stores. If your assessment is that stores occupy less than the equivalent of two full brood frames, feed your bees. The syrup should be made at a concentration of 1kg white granulated sugar to 1 litre of water.
Once you have completed your inspection, reassemble the hive as quickly and gently as possible. When your bees have drawn out all their comb you may wish to add a super depending on the time of year. Remember, to install a queen excluder between the brood box and any supers, you add. You may also conduct a varroa count as described here and undertake a sugar dusting.
Sections the seller will need to add or action:
Ask the purchaser if they require the queen to be marked and/or clipped.
If you plan to transport the queen caged, provide instructions on how to release her safely.
Provide information on the source of the queen.
Advise the purchaser of any treatments that have been applied to the nuc including method of application and dates.
This nucleus colony was delivered to the purchaser in accordance with the guidelines outlined by the National Bee Unit.
It is agreed with the purchaser, that once delivered, the developmental progress of the colony is the responsibility of the purchaser and no responsibility for any failure of the colony can be attributed to the seller. New beekeepers should refer to their mentor or an experienced beekeeper if they run into difficulties or have questions.
