Most beekeepers think queen rearing is difficult or fiddly and don’t combine it with their usual beekeeping practices. This page is based on an article by Dutch beekeeper Jeroen Vorstman published in BBKA news in March 2017.
The method described is based on the standard hive and doesn’t require any specialist equipment other than inexpensive plastic cell cups obtainable from beekeeping suppliers. The main limitation to the number of queens you can raise is your stock of spare equipment; either full-sized hives or nuc boxes. The method described below has the following advantages;
• You can use the same sized frames as you use in your other hives
• There is no need for mating hives, saving time and money
• It’s easier and safer to introduce a queen once she has mated by uniting rather than introducing her using a queen cage
• More bees means better queens
• On standard frames, it’s easier to tell if the queen is of good quality. If you use, for example, an Apidea mating nucleus which only has three small frames, even a poor quality queen is capable of filling them.
Another disadvantage of using mating nuclei is their size; a tiny colony can struggle to survive. It’s recommended to put one cupful of young bees into an Apidea. You are therefore relying on a cupful of inexperienced bees to care for a virgin queen and the beekeeper has to watch over the nucleus almost every day. The bees are too young to gather their own food so they rely on the beekeeper to feed them and sugar is not the most nutritious food for a young queen.
Bees in an Apidea are also vulnerable to robbing and wasp attacks. Also, if the colony starts to grow, the Apidea is too small for much expansion. Therefore, the question arises, how can you expect such a small colony to raise a good quality queen?
Jeroen Vorstman reports that he has rejected all such small mating nuclei on his bee farm. He raises all his queens on standard-sized frames and since doing so, has eliminated all losses during the mating period. He replaces all queens every year in his production colonies and believes queen rearing is the key to successful beekeeping.
What is queen rearing all about?
Queen rearing is all about raising the best quality queens. That is, physically perfect queens that produce bees with desirable characteristics like gentleness, resilience to pests and diseases, and productivity.
Breeder colony
The colony you wish to replicate should have good characteristics. If you have a colony that excels in honey crop, has a low propensity to swarming or any other trait you like, then breed from that colony. The larvae from your best colony are therefore destined to become queens.
Starter-finisher colony
To produce good quality queens, the larvae from your best colony will need the best care in a colony with plenty of nurse bees. Jeroen calls this colony (which you will make up) the starter-finisher because this is the colony that starts and finishes queen cell building.
The best time to create a starter-finisher colony is when the apple trees are flowering, perhaps in April or at the beginning of May, depending on the weather. To create the starter-finisher colony, you will need frames with brood and bees from your ordinary hives. If you only take one or two frames from each strong colony you will not deplete them too much or notice any reduction in honey production.
Breeding timetable
It is essential to stick to a timetable. The day you graft one day old larvae is day zero. Don’t worry, the grafting process is described below and the timetable is as follows;
• Seven to nine days before grafting, create your starter/finisher colony.
• Day zero: graft one day old larvae
• Exactly ten days after grafting, cage ripe queen cells
• Twelve days after grafting, create nucleus/nuclei hives
• Thirty days after grafting; young queens are laying eggs
Queen rearing in five steps
You will have noticed, there are five steps which are described below in more detail;
Step 1
On a warm day in April or the beginning of May, you start your preparations. Assembly a standard hive (floor, brood box, two full frames of stores (or equivalent), frames of drawn comb or foundation, crown board and roof. You’ll also need frames of drawn comb or foundation to replace the frames you will take from your other hives.
Open one of your other colonies and take one or two frames containing mainly sealed worker brood with attendant bees. There may be some eggs or very young larvae too. Put these two frames into your starter-finisher hive.
Shake in some additional bees from a further two frames then put these frames back into the parent colony.
Be very careful that the queen is not on any of the frames. If she is, just pop her back into the parent hive. Place the frames with honey either side of the frame(s) with brood and bees and complete the box with frames of drawn comb or foundation. The entrance should be closed.
Move the starter-finisher hive out of range (three miles away) of the donor colony/ies and open the entrance. Leave the starter-finisher hive alone for five to seven days.
Although you selected frames with mainly sealed brood, the bees will start emergency cells (Queen cells) using any young larvae or eggs you put in.
Step 2, Grafting (day zero)
When you return to your starter-finisher colony, five to seven days later, you must destroy all the emergency cells. There will probably be three or less, but don’t take this for granted. Shake the bees from the frame(s) and be certain that no queen cell has been missed.
Make a space in the middle of the starter-finisher hive by removing one of the unused frames from the hive. In this space, add the frame with one day old larvae from your breeder colony.
How do I know larvae is one day old? Jeroen provides this tip: four days before grafting, put a frame with empty drawn comb in the middle of the brood nest of the breeder colony; i.e. your best colony, the one you wish to replicate. The queen will soon start laying in the empty cells and three days later, the eggs will hatch. One day after they have hatched, they are the correct age for grafting. You can create as few or as many queen cells as you like up to twenty or thirty.
Grafting technique
Grafting is the action of transferring a larva from a brood cell into a manufactured cell cup. This technique allows beekeepers to create any number of queen cells. The common grafting technique is described below as well as the equipment needed for producing queen cells in moveable cell cups.
Before grafting
Before grafting, your starter-finisher colony must be available as described above. You will have already selected your breeder colony (as described above) and it’s from this colony you will obtain your frame containing one day old larvae.
One day old larvae (number 1 in the photo) are very small with a slight comma-shaped curvature, while older larvae (2, 3 and 4) are larger with a more defined C-shape.

Gently brush all bees from the selected frame, being careful not to damage the delicate larvae. The larvae must be grafted quickly upon their removal from the colony, as they are vulnerable to chilling, desiccation or starvation without nurse bees to regulate the temperature and humidity, or to provide feeding visits.
A damp towel draped over the frame will keep the humidity high and should be used to cover the part of the frame that you are not working on. Grafting should be carried out in a warm, draft-free room. For grafting, the donor frame is often placed on an incline and a torch or bright light is used to identify the best larval candidates.

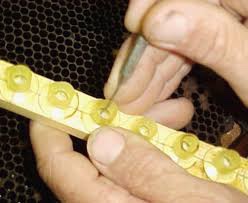
Many beekeepers graft into plastic cell cups, while others make their own from wax. When starting out, it’s easier to buy the plastic cups which are inexpensive and easy to obtain.
In this technique, the cell cups are pressed directly into the frame. The natural place is near the bottom of the frame but you can place the cups anywhere. Before grafting, prime the cell cups with a droplet of water. Priming prevents larvae from drying out but too much liquid can drown the larvae. Nurse bees will remove the priming liquid and replace it with royal jelly in the starter-finisher colony.

A variety of commercial grafting tools are available for this delicate work. Tool choice is subject to individual preference and some beekeepers create their own tools from materials such as wire, paper clips or other common household items.
Purchased grafting tool are often made of stainless steel and looks similar to a dental instrument. About the length of a pencil, these tools are easy to grasp and offers the beekeeper a great deal of control and visibility inside the cells.
Grafting technique
Grafting is delicate work and requires patience, a steady hand and excellent vision. To graft, lower the tool behind the curve of the larva, maneuver the tool under the larva and the small pool of royal jelly, and gently lift and transfer the larva to the centre of the cell cup Mastering the technique does take practice and repetition. Damaged, submerged, or poorly positioned larvae will not survive.
When grafting, be sure to cover the rest of the frame with a damp cloth to prevent dessication. After the desired number of grafts has been made, place the frame in the centre of the starter-finisher colony.
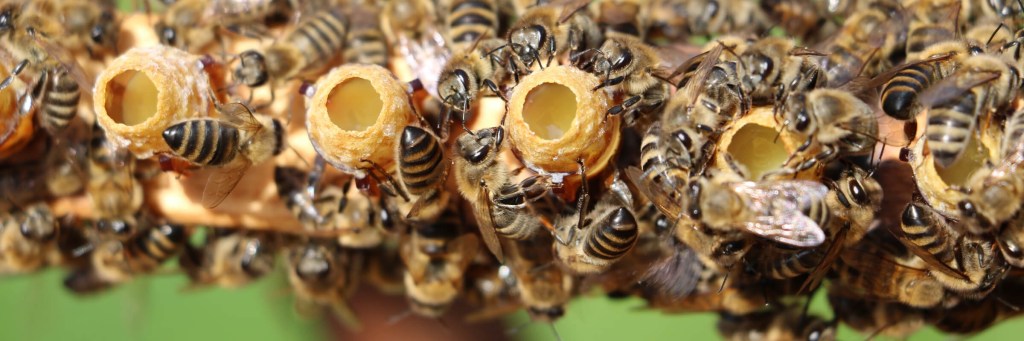
Step 3; cage ripe queen cells (ten days after grafting)
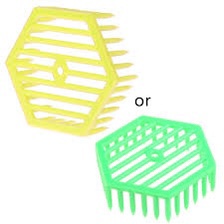
Exactly ten days later, the queen cells are ready to be caged. Put five young nurse bees into each cage to care for the queen when she emerges. There are different types of queen cage to choose from, remember to space your plastic cell cups to suit the type of queen cage you have selected. The spacing of the cups and where you place them on the frame will to a large extent, depend on how many queens you intend to raise.

Step 4: Making up a mating nucleus
Two days after you caged the queen cells, the queen will emerge. Put together as many nucleus colonies as there are queens or as many as you have equipment for and resources from other hives.
In every nucleus, place one frame with bees from the starter-finisher colony and one frame filled with honey. A frame from a super with capped honey will suffice.
After making up the nucs, leave for a couple of hours before introducing a virgin queen (with attendants) in an introduction cage. Place the nucleus colonies out of range of the starter-finisher’s former location and do not disturb for two weeks.
If you need more frames than are available from the starter-finisher colony, take frames with sealed worker brood from other strong colonies. Before moving the nucleus/nuclei out of range, leave time (30 minutes should do) to let the older bees fly off. This reduces the risk of harm to the young queen.
Step 5: inspect the mating nuclei (thirty days after grafting)
Two weeks after you made up your mating nuclei, most young queens will be laying eggs. Nucleus colonies without eggs can be checked again a week or so later. If there’s still no brood, they’re probably lost, shake the bees from the frames and take the nucleus hive away.
Nucleus colonies with brood must be fed with an intermediate strength syrup (1kg sugar to 1 litre water). Feed the bees until they have drawn out all the foundation and give them room as soon as they need it. By the end of a typical summer, the nucleus should have grown to a full-sized hive.
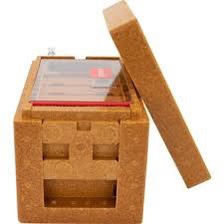
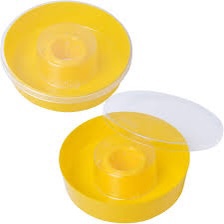
Small top feeder for use in a nucleus hive
One use for your new queens is to re-queen colonies with old or failing queens. Simply, remove the old queen and leave the colony for a couple of hours. Then combine the now queenless colony with the nucleus colony (containing the young queen) using the newspaper method.
